+86-20-86215789 service@adhesive-dy.com

Views: 0 Author: Site Editor Publish Time: 2026-07-29 Origin: Site
Building envelope failures carry severe financial and structural risks that visual inspection alone cannot identify. You cannot confirm the long-term viability of a sealed joint simply by looking at the finished bead. Unverified sealant adhesion on commercial facades routinely leads to costly rework, extensive water intrusion damage, and immediate warranty invalidation. When water breaches the building envelope, the resulting damage to interior substrates, insulation, and structural components far exceeds the initial cost of the sealant application. To prevent these catastrophic failures, construction professionals must rely on verifiable, standardized methods to ensure that the selected sealant bonds correctly to project-specific substrates under actual job-site conditions.
The field adhesion test, specifically utilizing ASTM C1521 methodologies, serves as the definitive solution for this industry-wide problem. This testing protocol confirms that the applied weatherproof silicone sealant performs exactly as specified by the manufacturer. By executing these tests on site, project teams validate the adhesive bond strength, ensuring the building envelope remains secure against wind-driven rain, thermal expansion, and dynamic structural movements.
Field adhesion testing is a mandatory quality assurance step for validating manufacturer warranties and ensuring long-term building envelope integrity.
ASTM C1521 provides the authoritative framework for both destructive (hand-pull) and non-destructive (blunt object) evaluation of installed sealants.
A successful test results in cohesive failure (the sealant tears before the bond breaks), proving the adhesive bond to the substrate is stronger than the sealant itself.
Documenting test results, including substrate preparation and primer usage, is critical for mitigating liability and confirming the performance of any specified weatherproof silicone sealant.
A successful joint installation requires a high-performance facade movement joint sealant that accommodates thermal expansion and wind loads without compromising the substrate bond. The primary goal of any weatherproofing application is to maintain a continuous, watertight seal across dissimilar building materials. When a joint expands during cold weather or contracts during hot weather, the sealant must stretch and compress. If the bond to the substrate is weak, the sealant will pull away, creating a direct path for water infiltration.
While pre-construction laboratory testing and standard mock-ups are necessary components of the design phase, they do not account for actual job-site variables. Laboratory conditions are controlled, clean, and climate-regulated. In contrast, construction sites are chaotic environments. Dust, moisture, temperature fluctuations, and inconsistent applicator techniques significantly impact final adhesion. A sealant that performs perfectly on a clean piece of aluminum in a lab might fail completely on a dusty, unprimed window frame on the 30th floor of a high-rise.
Early-stage field testing evaluates the efficacy of cleaning methods and primer selections on specific mockup substrates before full production scale-up. Field verification acts as the bridge between theoretical product specifications and actual on-site performance. By testing the first few installed joints, contractors can identify and correct surface preparation issues before thousands of linear feet of sealant are applied incorrectly.
Consider the variables introduced by different trades working in proximity. Masonry dust, cutting fluids from metal fabrication, and overspray from waterproofing membranes can contaminate joint surfaces. Field adhesion testing forces the installation team to prove their cleaning protocols work in the real world. It verifies that the "Two-Cloth Method" is being executed properly and that primers are flashing off for the correct amount of time before sealant application.
ASTM C1521 outlines the Standard Practice for Evaluating Adhesion of Installed Weatherproofing Sealant Joints. This document provides the exact procedures, tools, and evaluation criteria required to test sealants in the field. Sealant manufacturers typically require documented adherence to this standard to issue project-specific performance warranties. Without a log of successful ASTM C1521 tests, manufacturers will often refuse to cover labor or material costs if a joint fails.
Compliance with this standard ensures the installation meets rigorous quality control measures. It removes the subjectivity from joint inspection. Instead of a superintendent simply pressing a thumb into the sealant and declaring it "good," ASTM C1521 requires measurable, repeatable actions that yield definitive pass or fail results.
Standard Field Adhesion Testing Frequency Guidelines | ||
Project Phase / Scope | Recommended Testing Interval | Primary Objective |
|---|---|---|
Initial Mock-up / Start of Work | First 100 linear feet of installed joint | Verify cleaning, priming, and application techniques before scale-up. |
Standard Production | Every 1,000 linear feet thereafter | Maintain ongoing quality control and catch mid-project deviations. |
Elevation Changes | Once per floor or major elevation shift | Account for changes in wind load, temperature, and applicator access. |
High-Risk / Critical Areas | 100% Non-Destructive Verification | Ensure zero defects in highly visible or structurally critical zones. |
Industry-standard sampling rates balance rigorous quality assurance with project momentum. Testing every single inch of a building destructively is impossible, but testing too infrequently leaves massive blind spots. The standard approach of testing the first 100 feet, followed by intervals of 1,000 linear feet, provides a statistically significant sample size. High-risk projects, such as hospitals or museums housing sensitive artifacts, may specify 100% non-destructive joint verification to guarantee complete envelope integrity.
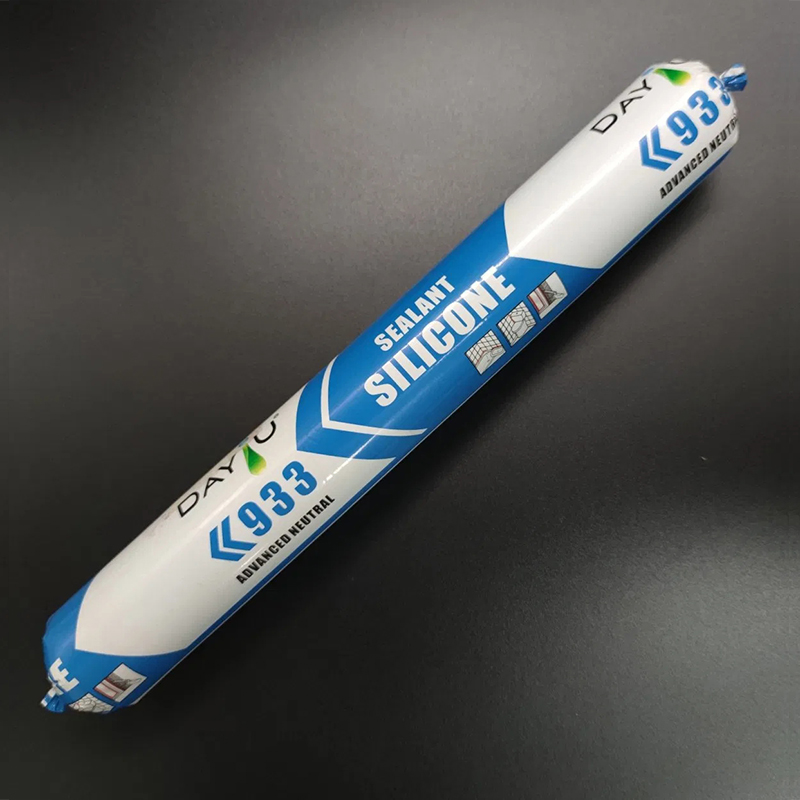
ASTM C1521 authorizes two primary testing categories to evaluate sealant adhesion in the field. Both methods provide critical data regarding joint performance, but they serve different purposes depending on the project phase and the visibility of the joint.
The destructive hand-pull test is the most definitive way to evaluate the bond strength of a cured sealant joint. It physically forces the material to its breaking point, revealing whether the weak link is the sealant itself or the bond to the substrate.
Preparation: Ensure the sealant has fully cured according to the manufacturer's specifications (typically 7 to 21 days).
Horizontal Cut: Make a clean, horizontal cut straight across the width of the joint using a sharp utility knife.
Vertical Cuts: Make two vertical cuts along the substrate interfaces, extending approximately 2 to 3 inches downward from the horizontal cut. This creates a loose flap of sealant.
Marking: Place a visible mark on the sealant flap exactly 1 inch from the bonded edge.
The Pull: Grasp the loose flap firmly. Pull the sealant flap at a 90-degree angle to the substrate.
Measurement: Use a physical measuring tape or a spring scale to record the exact elongation distance and the pull force required to cause failure. Compare these metrics against the manufacturer's technical data sheet.
Inspectors must measure elongation before failure and assess the failure mode carefully. If the technical data sheet states the sealant should withstand 50% elongation, and the joint fails at 20%, the installation is defective. The destructive nature of this test means the tested area must be repaired immediately to restore the weather seal.
The non-destructive depression test provides a way to evaluate joint integrity without cutting into the cured material. This method is highly appropriate for highly visible architectural areas where patching is undesirable, or for continuous 100% joint verification on critical facades.
Tool Selection: Select a blunt object, such as a specialized testing probe or a rounded dowel. The diameter of the object must be at least 1/8 inch less than the width of the joint being tested.
Application of Force: Press the blunt object directly into the center of the sealant bead.
Depression Depth: Depress the middle of the sealant body by at least 50% of its depth.
Observation: Watch the bond line at the substrate interface closely. The pressure forces the sealant to bulge outward against the substrate.
Release and Inspect: Remove the tool. The sealant should recover its original shape without any tearing or separation at the bond line.
If the sealant separates from the substrate during the depression test, it indicates a localized adhesion failure. While not as comprehensive as the hand-pull test, the non-destructive method allows inspectors to cover vast amounts of linear footage quickly without generating repair work.
Interpreting test results correctly is vital for assessing joint integrity. The physical reaction of the sealant during the pull test tells the inspector exactly what went wrong—or right—during the installation process.
The target outcome is cohesive failure. In a cohesive failure, the sealant material tears internally before the bond to the substrate breaks. This indicates the bond to the substrate is structurally sound and stronger than the sealant itself. When you pull the flap, the rubber snaps, leaving a thick layer of sealant still firmly attached to both sides of the joint. This is a definitive pass.
Adhesive failure constitutes a test failure. The sealant pulls cleanly away from the substrate, leaving bare metal, glass, or concrete behind. This indicates poor surface preparation, lack of primer, or chemical incompatibility. If the sealant peels off like tape, the joint will inevitably fail under normal building movement.
Sealant Failure Modes and Root Causes | |||
Failure Mode | Visual Indicator | Common Root Causes | Test Result |
|---|---|---|---|
Cohesive Failure | Sealant tears internally; material remains on substrate. | Proper installation; bond is stronger than the material. | PASS |
Adhesive Failure | Sealant peels cleanly off the substrate; no residue left. | Dust contamination, missing primer, improper cleaning. | FAIL |
Adhesive/Cohesive Hybrid | Partial tearing and partial clean peeling. | Inconsistent primer application, spotty cleaning. | EVALUATE (Log percentages) |
In cases of an adhesive/cohesive hybrid, inspectors log partial failures, such as 80% cohesive and 20% adhesive, to evaluate overall bond strength. Manufacturers typically require a minimum of 80% cohesive failure to issue a warranty, though this varies by product and substrate.
Substrate-specific variables heavily impact adhesion expectations. Porous substrates like concrete, brick, and natural stone absorb moisture and often require specific film-forming primers to create a bondable surface. Non-porous substrates like glass, anodized aluminum, and fluoropolymer coatings require aggressive solvent cleaning to remove manufacturing oils. Applying a construction weatherseal silicone without understanding these substrate differences guarantees test failures.
Building a compliant ASTM C1521 inspection log requires capturing essential data points accurately. A test that is not documented did not happen. Manufacturers rely entirely on these logs to verify that the installation met their requirements.
The field adhesion test report must include the project name, location, date of installation, and date of testing. Specific joint identification, such as elevation, floor, and window or panel ID, is necessary to track exactly where failures occur and map out repair zones.
The report must detail the substrate type, the exact cleaning protocol used (e.g., Isopropyl Alcohol with the Two-Cloth Method), and the primer batch number. It should list the specific sealant product name, color, and lot/batch number. Tracking batch numbers allows the manufacturer to investigate potential material defects if widespread failures occur.
Additional required information includes the cure time (number of days elapsed since installation), the test method used (destructive hand-pull vs. non-destructive depression), the observed failure mode (percentage of cohesive vs. adhesive failure), the elongation percentage achieved before failure, the pass/fail status, corrective actions required, and the signature of the inspector.
Testing too early presents a significant risk to the evaluation process. The sealant must fully cure before conducting a pull test. Silicone sealants cure via reaction with atmospheric moisture. Depending on temperature, humidity, and the depth of the joint, this process typically requires 7 to 21 days. Pulling a joint that is only cured on the surface will result in a false cohesive failure, as the wet material inside will tear easily, masking potential adhesive issues at the substrate interface.
Adhesive failures connect directly to poor job-site practices. Implementing the Two-Cloth Method for cleaning mitigates the risk of contamination. This method involves wiping the substrate with a solvent-soaked lint-free cloth, immediately followed by wiping the same area with a clean, dry cloth before the solvent evaporates. This lifts and removes contaminants rather than just smearing them around.
Strict protocols for primer application are equally critical. Primers must be applied in a thin, even film and allowed to dry completely. Over-priming can create a powdery residue that acts as a bond breaker, causing the exact adhesive failure the primer was meant to prevent.
Repairing destructive test sites requires specific technical protocols to ensure the patched area maintains the same weatherproof integrity as the surrounding facade.
Clean the Cut Ends: Wipe the cured sealant faces where the cut was made with an approved solvent to remove dirt and oils transferred from the inspector's hands.
Substrate Prep: Clean the exposed substrate using the Two-Cloth Method.
Primer Application: Apply new primer to the substrate if required by the manufacturer, ensuring it does not pool or run onto the existing cured sealant.
Sealant Installation: Gun new sealant into the void, ensuring it ties into the existing cut ends by at least 1/2 inch to create a watertight splice.
Tooling: Tool the new sealant flush with the existing bead to ensure proper wet-out and a seamless appearance.
Field adhesion testing remains a critical, standardized requirement for verifying joint integrity on any commercial facade. Skipping this step exposes the project to massive liability and guarantees that installation errors will only be discovered after water damage has occurred. By enforcing ASTM C1521 protocols, construction teams ensure their weatherproofing systems perform exactly as engineered.
Integrate ASTM C1521 testing protocols directly into your project specifications and submittal requirements.
Schedule mandatory pre-installation meetings with sealant manufacturers to align on surface preparation and testing expectations.
Establish a rigorous quality assurance documentation process using standardized field logs to track every test location and result.
Train all field personnel on the proper execution of the destructive hand-pull test and the repair protocols for tested joints.
A: ASTM C1521 is the standard practice for evaluating the adhesion of installed weatherproofing sealant joints. It details the specific procedures, tools, and evaluation criteria for both destructive hand-pull tests and non-destructive depression tests on active construction sites.
A: Sealants typically require 7 to 21 days to fully cure before testing. Cure times vary significantly based on environmental factors like temperature and humidity, joint depth, and the specific chemical formulation of the product.
A: Cohesive failure occurs when the sealant material tears internally, indicating a successful bond to the substrate. Adhesive failure happens when the sealant pulls cleanly away from the substrate, indicating a failed bond due to poor preparation or incompatibility.
A: Standard intervals usually involve testing the first 100 linear feet of a joint to verify initial techniques, followed by tests every subsequent 1,000 linear feet or at major elevation changes to maintain quality control.
A: Yes, the non-destructive depression method uses a blunt object to depress the sealant body by 50% without puncturing it. This allows inspectors to evaluate bond integrity without requiring subsequent joint repairs.
A: Critical data points include the exact joint location, cure time, substrate preparation methods, primer batch details, observed failure mode (cohesive vs. adhesive percentage), elongation percentage, and the final pass/fail result.
A: The applicator, QA inspector, and manufacturer representative typically collaborate to conduct, verify, and document field adhesion tests. The QA inspector or manufacturer rep usually signs off on the final compliance logs.


