+86-20-86215789 service@adhesive-dy.com

Views: 0 Author: Site Editor Publish Time: 2026-08-28 Origin: Site
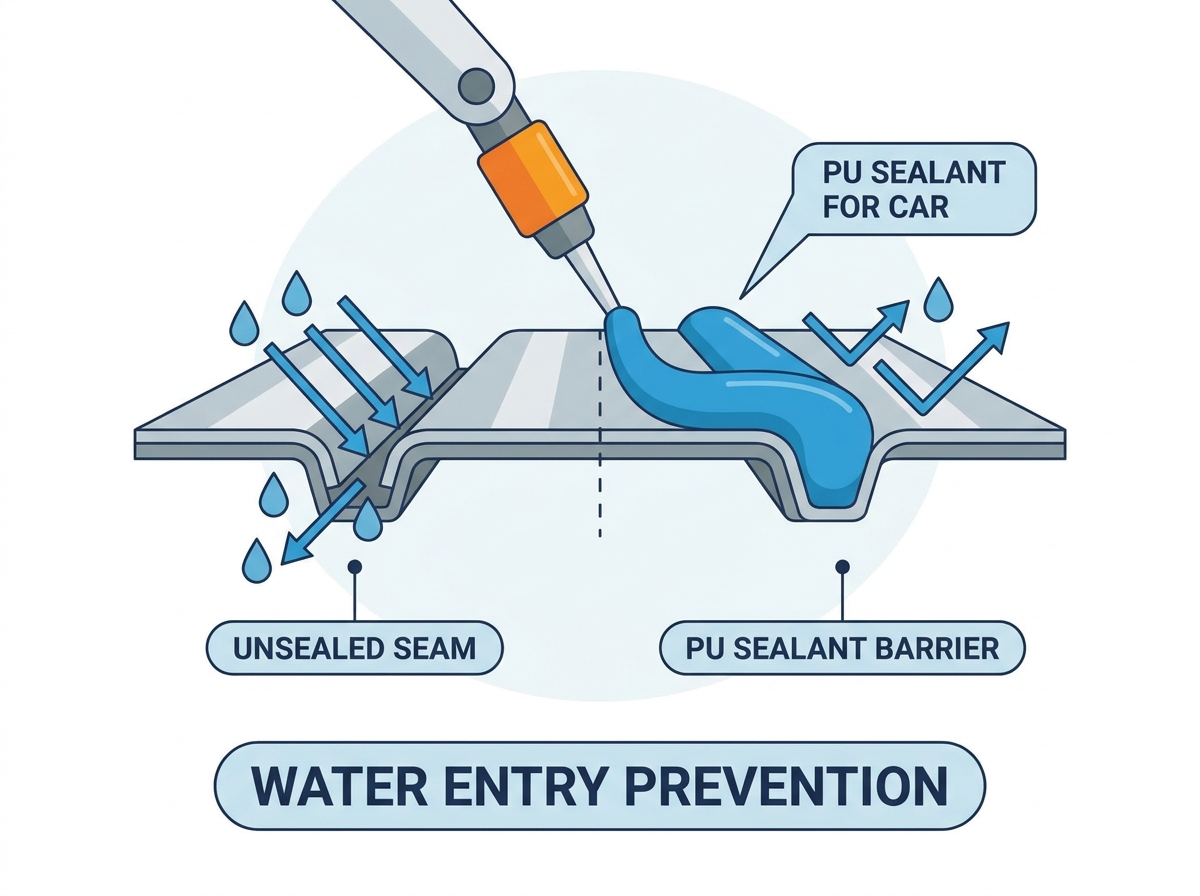
Water, dust, and exhaust intrusion in automotive body seams carry compounding structural and financial costs. Unchecked moisture leads to hidden oxidation, severe floor pan rot, and compromised cabin acoustics. Factory spot welds, stitch-welded flanges, and mechanical joints are not inherently watertight or airtight. Water easily finds its way through these microscopic gaps during rainstorms or standard vehicle washing.
Standard body fillers, such as polyester-based compounds, fail to solve this problem. They cure into rigid structures and are highly prone to cracking under normal chassis flex. Worse, these fillers can actively absorb moisture, accelerating metal degradation beneath the surface. Selecting the correct chemical barrier is required for executing OEM-equivalent repairs that last.
Polyurethane sealants serve as the industry standard for bridging these vulnerable gaps. They dampen vibration, provide structural support, and create a permanent, flexible moisture barrier. Utilizing a high-quality PU Sealant for Car applications ensures long-term structural integrity and restores the vehicle to factory specifications.
Polyurethane sealants cure via ambient moisture to form a permanent, elastomeric barrier that flexes with chassis movement without breaking adhesion.
Proper metal preparation (epoxy primer application prior to sealing) is a non-negotiable prerequisite for preventing sub-sealant corrosion and dirt accumulation.
Application consistency (brushable, sprayable, or extrudable) must be matched to the specific seam location and factory texture requirements.
Unlike silicone, RV lap sealants, or standard body fillers, automotive PU sealants are fully paintable and designed specifically for professional paint shop environments.
Capillary action actively pulls water into tight spaces. Water does not simply rest on the surface of an overlapping panel. Surface tension draws it deep into the micro-gaps of unsealed pinch welds. Road salts, dust, and microscopic debris follow the water path. This corrosive mixture sits trapped inside the metal joints. Galvanic corrosion begins silently, eating away at the factory steel long before any rust bubbles appear on the exterior paint.
Consider a standard rear wheel arch replacement. The technician spot welds the new quarter panel to the inner wheelhouse. Each spot weld holds a fraction of a square inch of metal together. The spaces between those welds remain open. Without a chemical barrier, water thrown up by the rotating tire forces its way into that overlap.
Chassis torsion accelerates this failure. Vehicles constantly twist and flex over uneven road surfaces. Thermal expansion causes metal panels to grow and shrink at different rates depending on ambient temperatures. Spot welds hold the panels together, but the mechanical joints between those welds experience constant sheer stress. This movement leads to micro-separations. Moisture pools in these newly formed voids, rotting the structural steel from the inside out.
Polyester body fillers cure into a hard, inflexible plastic. They cannot accommodate the dynamic movement of a vehicle chassis. When the vehicle frame twists during cornering or over bumps, the rigid filler fractures. These micro-cracks immediately retain water. Because polyester resin is inherently hygroscopic, it pulls moisture directly against the bare steel substrate, guaranteeing rapid oxidation.
Architectural or RV-grade lap sealants present different but equally severe risks. Self-leveling roof sealants repel water effectively on static structures like houses or trailers. However, they lack the shear strength required for structural panel support on a moving vehicle. Furthermore, they cannot withstand the high-temperature bake cycles used in professional automotive paint booths. Heat causes them to melt, shift, or outgas. This outgassing leads to severe paint adhesion failures, fisheyes, and peeling topcoats.
Polyurethane relies on a specific chemical curing process. The material reacts directly with atmospheric humidity. Upon exposure to air, the isocyanate compounds within the sealant react with moisture, causing the polymer chains to cross-link. This chemical reaction transforms the workable paste into an impermeable, rubber-like solid. The ambient humidity dictates the speed of this cure, making environmental control important in a shop setting.
This cured chemical structure resists severe degradation. It easily withstands incidental exposure to automotive fluids like motor oil, engine coolant, and brake fluid. It also deflects high-velocity road debris without chipping. Prolonged water exposure does not break down the urethane bonds. It effectively seals out both moisture and corrosive dust, protecting the vulnerable metal seams beneath for decades.
Environmental Impact on Polyurethane Cure Rates
Shop Environment | Temperature | Relative Humidity | Estimated Skin-Over Time | Full Cure Depth (24h) |
|---|---|---|---|---|
Optimal Paint Booth | 75°F (24°C) | 50% | 30 - 45 minutes | 3mm - 4mm |
Cold / Dry Winter Shop | 55°F (13°C) | 20% | 90 - 120 minutes | 1mm - 2mm |
Hot / Humid Summer Shop | 90°F (32°C) | 80% | 15 - 20 minutes | 4mm - 5mm |
The modulus of elasticity defines how a sealant stretches and recovers under load. High elongation before break is a required metric for automotive applications. It allows the cured material to provide structural support to overlapping panels. The sealant stretches as the chassis flexes, absorbing the kinetic energy and preventing the adhesive bond from snapping under stress.
Beyond moisture protection, polyurethane provides massive secondary benefits. It offers excellent acoustic dampening. Thick beads of urethane isolate the cabin, significantly reducing road noise transmission and panel vibration. It also blocks hazardous exhaust fumes. Sealing hollow body cavities and floor pan joints prevents carbon monoxide and other noxious gases from migrating into the passenger compartment.
Choosing the right viscosity ensures a factory-correct repair and dictates the final appearance of the seam. You must match the material to the specific location on the vehicle.
Extrudable/Heavy-Bodied: These formulas work best for filling large gaps. Technicians use them on drip rails, roof ditches, and trunk seams. They provide a thick, non-sag bead that stays exactly where applied without running down vertical surfaces.
Brushable: These formulas replicate factory-brushed seams. You will find these specific textures on interior floor pans, firewall joints, and strut towers. A stiff nylon brush easily manipulates the material before it skins over, leaving distinct brush strokes that match OEM aesthetics.
Sprayable: These formulas match OEM textured finishes. Wheel wells, rocker panels, and undercarriages require this application. Using a specialized pneumatic gun, the sprayed texture protects against high-impact road debris while matching the original factory sound-deadening appearance.
Replicating a factory brushed seam requires a specific technique. First, lay down a medium bead of extrudable PU sealant for car joints directly over the primer. Next, dip a stiff-bristled seam sealer brush into a small amount of urethane reducer. Drag the brush through the bead in one continuous motion. Do not overwork the material. The reducer prevents the urethane from sticking to the bristles while leaving deep, factory-style striations.
Evaluating an automotive body seam sealer requires understanding its cure schedule. "Skin-over" time dictates when the surface is tack-free and ready for light handling. Full cure time indicates when the material has completely cross-linked throughout its entire depth. This schedule directly impacts paint shop throughput, vehicle turnaround times, and overall labor efficiency.
Modern collision workflows demand wet-on-wet paintability. Technicians need to apply basecoat shortly after the sealant skins over. Waiting days for a full cure slows down production unacceptably. However, painting too early traps evaporating solvents beneath the fresh paint. Solvent entrapment causes blisters and solvent pop in the final clearcoat. Always follow the specific skin-over window provided by the manufacturer to ensure seamless topcoat integration.
If you miss the wet-on-wet window and the sealant achieves a full cure, you cannot simply spray paint over it. The paint will not adhere to the slick, cured urethane. You must lightly scuff the cured bead with a grey abrasive pad to create a mechanical profile, then apply an adhesion promoter before laying down the basecoat.
Manufacturer specifications often detail direct-to-metal (DTM) capabilities. Some polyurethane formulations bond aggressively to bare steel, galvanized steel, or aluminum. Others strictly require application over a 2K epoxy primer to achieve their rated adhesion strength.
While DTM-rated products offer convenience, best practices dictate a different approach. Maximum corrosion resistance requires sealing over a fully cured epoxy primer. Epoxy primer chemically bonds to the metal, sealing out oxygen and moisture completely. The polyurethane then bonds mechanically and chemically to the scuffed epoxy. This two-step barrier guarantees long-term protection against rust, far exceeding the protection of bare metal application.
Follow these steps for maximum adhesion over primed surfaces:
Spray two medium-wet coats of 2K epoxy primer over the bare metal repair area.
Allow the epoxy primer to flash and cure according to the technical data sheet (usually 24 hours for full cross-linking).
Scuff the cured primer lightly with a red abrasive pad to remove the surface gloss.
Blow off the sanding dust with clean, dry compressed air.
Wipe the joint with a waterborne surface cleaner and let it flash dry completely.
Extrude the polyurethane sealant directly into the scuffed joint, tooling it to the desired shape.
Strict mechanical abrasion is required before applying any chemical barrier. Technicians must scuff the surface with red abrasive pads or 80-120 grit sandpaper to create a mechanical profile. Chemical degreasing must follow the abrasion. Solvent-based or waterborne wax and grease removers eliminate oils, silicones, and sanding dust. Any remaining dirt or debris will instantly compromise the adhesive bond.
Applying polyurethane over rust converters introduces massive risk to the repair. Rust converters leave an unstable, acidic film on the metal surface. Polyurethane requires a stable, neutral, and clean substrate to cross-link properly. Adhesion failure is almost guaranteed if the sealant is applied over unconverted rust, loose scale, or unstable chemical treatments. You must cut out the rust, weld in fresh steel, prime it, and then seal it.
Water intrusion does not only happen from the exterior environment. Interior sealing is an absolute necessity for complete vehicle restoration. Floor pans, firewall joints, and trunk basins require heavy sealing on the interior side of the metal overlaps.
Wet carpets hold moisture against floorboards for months, often without the owner noticing. Snow melting off winter boots soaks directly into the carpet padding. Condensation builds up behind dashboard panels and interior trim due to temperature fluctuations. Sealing the interior prevents this internal moisture from penetrating the seams and rusting the metal outward. It also blocks dust and dirt from accumulating in hidden crevices, keeping the cabin environment clean.
Exposed polyurethane vehicle joint sealant remains vulnerable to ultraviolet degradation. Aromatic polyurethanes, which are the most common type used in collision repair, break down under direct, prolonged sunlight.
UV exposure causes the material to chalk, turn yellow, crack, and eventually lose adhesion to the substrate. Top-coating is mandatory for any exterior-facing seam sealer. Applying automotive paint, clearcoat, or a heavy rubberized undercoating provides the necessary UV stability. This topcoat blocks the radiation, ensuring the flexible barrier lasts the lifetime of the vehicle without degrading. If you are sealing a roof ditch that will not be covered by a plastic molding, you must paint over the urethane bead.
Silicone is strictly unsuitable for automotive bodywork. It severely contaminates paint shop environments. Airborne silicone particles cause "fisheyes" in wet paint, ruining expensive topcoats and requiring complete panel stripping. Furthermore, standard silicone cannot be painted over. Automotive basecoats and clearcoats simply bead up and roll off the silicone surface, making invisible repairs impossible. Keep silicone out of the body shop entirely.
Collision repair requires choosing between 1K PU and 2K epoxy based on joint dynamics. 1K PU sealants offer high flexibility, excellent elongation, and lower material costs. They absorb vibration and handle panel flex effortlessly, making them ideal for floor pans, roof ditches, and trunk seams.
2K epoxy seam sealers provide rapid cure times and extreme rigidity. They do not shrink and offer incredible structural bonding strength. However, they lack the flexibility of urethane. Choose PU for dynamic joints requiring vibration dampening and movement accommodation. Choose epoxy for static, structural bonding where panel movement is non-existent and rigidity is required.
Comparison of Automotive Sealant Types
Feature | 1K Polyurethane (PU) | 2K Epoxy Sealer | Silicone Sealant |
|---|---|---|---|
Flexibility | High (Accommodates chassis flex) | Low (Highly rigid) | High (But unpaintable) |
Paintability | Excellent (Can be painted wet-on-wet) | Excellent (Requires scuffing if fully cured) | Poor (Causes fisheyes and paint rejection) |
Cure Mechanism | Moisture-curing (Reacts with humidity) | Chemical cross-linking (Hardener required) | Moisture-curing |
Best Application | Drip rails, floor pans, trunk seams | Structural joints, NVH foam replacement | Household plumbing (Avoid on cars) |
For preventing water entry, corrosion, and dust intrusion, a dedicated automotive PU sealant remains the most reliable, chemically appropriate choice for modern body repair. It bridges the gap between structural integrity and necessary flexibility, outperforming rigid body fillers and unpaintable silicones. When shortlisting products, select your sealant based on the required application texture, your paint shop workflow, and specific OEM matching requirements. Matching the factory texture ensures a professional, undetectable repair.
Follow these next steps to execute a flawless seam repair:
Consult the Technical Data Sheet (TDS) of your shortlisted products to verify primer compatibility and exact skin-over times.
Prepare the metal by removing all rust, applying a 2K epoxy primer, and scuffing the cured primer for maximum mechanical adhesion.
Select the correct application tool—caulking gun, nylon brush, or pneumatic spray gun—to match the original factory seam texture.
Apply the topcoat within the manufacturer's specified wet-on-wet window to prevent UV degradation and ensure perfect paint adhesion.
A: While some formulations are rated direct-to-metal (DTM), applying them over bare steel is not best practice. For superior corrosion protection, always apply an automotive 2K epoxy primer first. The primer seals the metal from oxygen, and the sealant provides the flexible moisture barrier over the primer.
A: Cracking usually results from improper surface preparation, using expired products, or applying the sealant over an incompatible, flexible substrate like unconverted rust. It can also occur if a non-automotive, rigid filler was mistakenly used in a high-flex joint instead of a true elastomeric polyurethane.
A: Skin-over time typically ranges from 30 to 90 minutes, allowing for wet-on-wet painting. Full cure can take 24 to 72 hours. These times are highly dependent on ambient temperature and humidity in the paint shop. Always check the manufacturer's Technical Data Sheet for exact timing.
A: Yes. Sealing both sides is the industry best practice. It prevents moisture, road salt, and dirt from entering the exterior, while simultaneously blocking cabin condensation or wet carpet moisture from penetrating the joint from the inside.
A: No. Body filler is extremely rigid, prone to cracking under chassis flex, and actively absorbs water. RV lap sealants lack structural shear strength and will melt or outgas during a paint booth bake cycle, ruining the paint job.
A: Yes. Once fully cured, polyurethane forms a highly durable, waterproof, and dustproof elastomeric barrier. As long as the initial adhesion to the substrate remains uncompromised and properly prepped, it will block water intrusion indefinitely.