+86-20-86215789 service@adhesive-dy.com

Views: 0 Author: Site Editor Publish Time: 2026-07-30 Origin: Site
Relying solely on a construction mounting adhesive for permanent fixtures carries inherent structural risks if substrate compatibility, chemical formulations, and load dynamics are misunderstood. Selecting the wrong adhesive formulation for specific materials—or failing to account for porosity, surface energy, and environmental conditions—leads to catastrophic bond failure, wasted materials, and safety hazards on the job site. You cannot simply grab any tube off the shelf and expect it to hold structural weight across different materials. This guide provides an evidence-based breakdown of material compatibility, evaluating how different formulations perform across wood, metal, plastic, and masonry. We will look at the exact chemical interactions happening beneath the surface and outline the critical surface preparation protocols required to ensure a permanent, fail-safe bond.
Porosity Dictates Curing: At least one of the two bonding surfaces must typically be porous (like wood, drywall, or fiber cement) for standard water-based or solvent-based Liquid Nails to cure properly; bonding two non-porous surfaces requires specific moisture-curing polyurethane formulations.
Material-Specific Limitations: While highly effective on wood and masonry, standard formulations often fail on low-surface-energy plastics (like polyethylene) and require rigorous degreasing and mechanical abrasion before application on metals.
Not a Replacement for Structural Fasteners: Heavy duty adhesive products are designed to supplement, not entirely replace, mechanical fasteners (screws/nails) in load-bearing, overhead, or sheer-stress applications.
Preparation is Non-Negotiable: The majority of adhesive failures stem from applying the product too thinly, applying it to dusty, oily, or excessively smooth surfaces, or ignoring product-specific environmental ratings (interior vs. exterior).
Understanding adhesion requires recognizing it as a chemical and mechanical lock. It is not just a sticky surface layer sitting between two pieces of material. Success depends entirely on the adhesive wetting the surface completely and curing fully without joint starvation. If the adhesive cannot penetrate the microscopic pores of the substrate, the bond remains superficial. A superficial bond will inevitably fail under shear or tensile stress the moment the building settles or the temperature fluctuates. You need the adhesive to bite into the material, creating a bridge that transfers the load evenly across the entire joint.
Solvent and water-based adhesives rely heavily on evaporation. The moisture or solvent must escape through the substrate to achieve full tensile strength. If you trap these adhesives between two impermeable layers, they remain soft indefinitely, acting more like a lubricant than a binder. Common porous materials include softwoods, hardwoods, unsealed concrete, drywall, plasterboard, and fiber cement. These materials absorb moisture, allowing the adhesive to cure rapidly and form a rigid hold. Non-porous materials include metal, glass, and rigid plastics. Bonding these requires entirely different chemical mechanisms, usually relying on ambient humidity rather than evaporation.
Identify the primary substrate material and classify it as porous or non-porous.
Identify the secondary substrate material and classify its porosity.
If both are non-porous, immediately rule out water-based and standard solvent-based adhesives.
Select a moisture-curing polyurethane adhesive for dual non-porous applications.
Latex and water-based formulations offer low VOC emissions and easy cleanup with just a damp rag. They are exceptionally fast at bonding to porous substrates like wood, plasterboard, and particle board. However, they strictly require at least one highly porous surface to cure. Solvent-based options deliver faster tack, better temperature resistance, and strong initial grab. They bite into materials aggressively but are subject to local VOC regulations and California Prop 65 compliance warnings. Polyurethane formulations represent the extreme tier. They are moisture-cured, low solvent, and expand slightly during the curing process. This makes them the definitive choice for bonding two non-porous surfaces together, filling microscopic gaps as they expand.
Using liquid nails for wood yields excellent results across almost all framing and finishing applications. It works seamlessly with softwoods like pine and hardwoods like oak. It also performs exceptionally well on engineered materials like plywood, OSB, particle board, and medium-density fiberboard (MDF). Wood moisture content must remain below 18% for optimal bonding. Wet lumber, often found sitting out on job sites, prevents the adhesive from penetrating the wood fibers. The water inside the wood blocks the adhesive from soaking in. End-grain bonding requires sizing. You must pre-coat the end grain with a thin layer of adhesive because it absorbs liquid too rapidly, which can starve the final joint and leave you with a weak connection.
Wood Type | Porosity Level | Adhesive Penetration | Special Considerations |
|---|---|---|---|
Dimensional Pine (Softwood) | High | Deep | Check for excessive sap or pitch pockets before applying. |
Oak / Maple (Hardwood) | Medium | Moderate | Requires tight clamping to prevent joint creep during cure. |
OSB / Plywood | High | Deep | Excellent for subfloor applications to prevent squeaks. |
MDF / Particle Board | Very High | Excessive | May require sizing the edges to prevent adhesive starvation. |
Compatibility with metal ranges from moderate to high, heavily depending on the specific formulation you pull from the truck. You can use liquid nails for metal on aluminum, steel, and galvanized surfaces, but metal surfaces present distinct implementation risks. They are entirely non-porous. Furthermore, manufacturers often coat them in factory cutting oils to prevent rust during shipping. Oxidation and zinc galvanization also interfere with adhesion, creating a false surface that flakes away under stress. Mitigation requires aggressive degreasing using solvents like acetone. You must also perform mechanical abrasion, scuffing the surface with a wire brush or heavy-grit sandpaper to create a profile. Bonding metal to metal demands a polyurethane-based heavy duty adhesive.
Plastic compatibility is highly variable and often a source of frustration on site. liquid nails for plastic works effectively on rigid plastics like PVC, ABS, and fiberglass. You will often see it used for securing PVC trim boards or fiberglass shower surrounds. However, standard formulations will universally fail on low-surface-energy plastics. These include Polyethylene (PE), Polypropylene (PP), and Teflon (PTFE). The adhesive simply beads up and peels off once dry, much like water on a waxed car. You must verify the exact plastic type before application. Look for the recycling stamp on the back of the material. Use specialized plastic adhesives for PE and PP rather than a generic construction mounting adhesive.
Compatibility with masonry and drywall is exceptionally high. Liquid Nails excels at bonding drywall to wood or steel studs, significantly reducing the number of screws required and minimizing nail pops as the lumber dries. It is equally effective for attaching masonry veneer to concrete walls or securing landscape blocks. Concrete must be fully cured for a minimum of 28 days. The surface must be entirely free of efflorescence, dust, or release agents used in the formwork. When working with drywall, the limiting factor is the tear strength of the paper facing. The adhesive itself rarely fails; the paper simply tears away from the gypsum core under extreme stress.
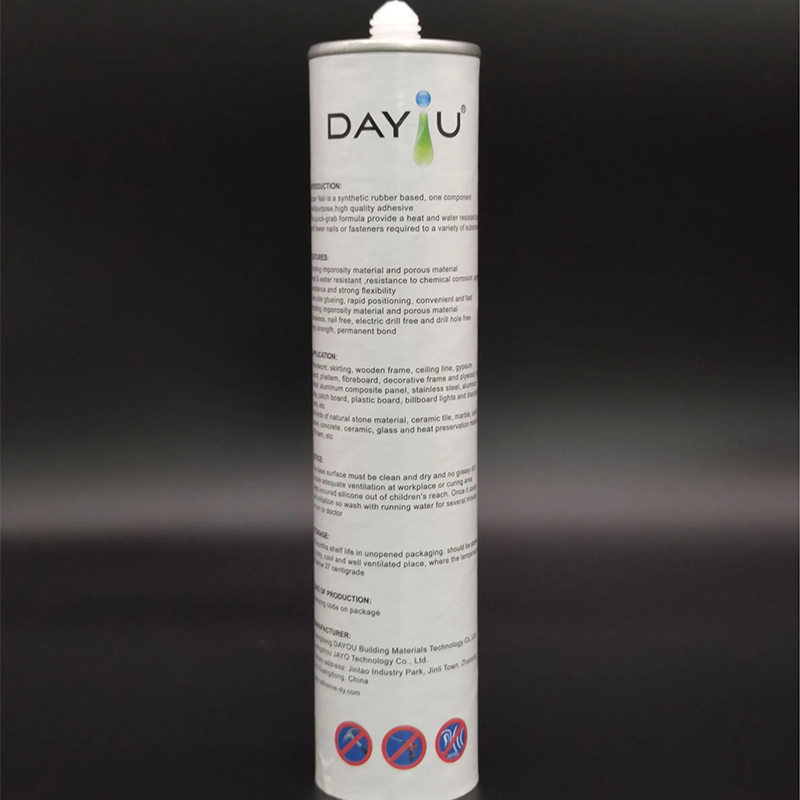
A common misconception in modern construction is the feasibility of completely screwless installations. Attempting to mount heavy shelves to furring strips using only adhesive to avoid visible screw holes invites structural failure. Adhesives possess high tensile strength but exhibit significantly lower shear, peel, and creep resistance compared to mechanical fasteners. Overhead applications, such as heavy ceiling panels or suspended fixtures, require permanent mechanical support. Gravity exerts constant peel stress that adhesives are not designed to withstand indefinitely. If the adhesive fails overhead, the material drops without warning.
Application temperature limits are strict and often ignored during winter builds. You must apply the adhesive when surface and air temperatures are between 40°F and 100°F. Applying outside this window alters the viscosity. Cold adhesive becomes too thick to extrude properly and fails to wet the substrate. Hot adhesive flashes off its solvents too quickly, skinning over before you can mate the materials. Standard interior grades face severe failure risks when exposed to freeze-thaw cycles. Continuous submersion in swimming pools or marine environments will degrade standard formulations rapidly. Always verify the exterior and waterproof ratings on the technical data sheet before using it outside.
The putty knife error is a frequent cause of failure. Spreading the adhesive too thinly with a putty knife starves the joint. It prevents the adhesive from forming a proper mechanical bridge between uneven surfaces. You need the bulk of the bead to fill the gaps. Skinning over occurs when you wait too long to mate the surfaces. The adhesive forms a dry outer skin that prevents transfer and wetting. Inadequate bracing is another critical error. Failing to mechanically brace or clamp the materials for the full 24 to 48 hour cure cycle allows micro-movements. Even a slight bump to the material shatters the developing chemical bonds, forcing you to scrape it off and start over.
Never spread the adhesive flat; maintain a thick, continuous bead.
Mate the surfaces within 10 minutes of extrusion to prevent skinning.
Always use clamps, temporary screws, or bracing props for at least 24 hours.
Do not apply to frozen lumber or frost-covered concrete.
Evaluating trade-offs involves balancing the speed of installation and aesthetic finish against verifiable, immediate structural integrity. Adhesives eliminate screw holes, reduce thermal bridging, and distribute stress across a wider area rather than concentrating it at a single point. Fasteners provide instant, measurable load-bearing capacity and pull materials tightly together. The best practice is the belt and suspenders approach. Use a heavy duty adhesive to prevent squeaks, vibration, and lateral movement. Simultaneously, use screws or nails to provide the primary structural hold while the adhesive cures. This hybrid approach is standard for subfloors and stair treads.
Fastening Method | Primary Advantage | Primary Weakness | Best Application |
|---|---|---|---|
Adhesive Only | No visible holes, stress distribution | Requires cure time, weak peel strength | Lightweight trim, paneling, veneers |
Screws / Nails Only | Immediate structural hold | Concentrated stress points, squeaks | Framing, temporary bracing |
Hybrid (Adhesive + Fasteners) | Maximum strength, no movement | Slower installation process | Subfloors, stair treads, drywall |
Standard construction adhesives have limits. Two-part epoxies are mandatory for high-stress, load-bearing metal-to-metal bonds. Epoxies cross-link chemically to form a rigid, incredibly strong matrix that can handle massive shear loads. 100% silicone is required for applications demanding extreme flexibility. Areas subject to significant thermal expansion, contraction, or constant water exposure require silicone. Rigid construction adhesives will crack under these dynamic conditions. If you are sealing a joint that will move more than a quarter of an inch, leave the construction adhesive in the truck and grab the silicone.
Cleaning is the foundational step. You must remove all dust, grease, wax, and loose paint. Adhesives bond to the top layer of whatever they touch. If they touch sawdust, they bond to the sawdust, not the wood beneath it. Mechanical keying is essential for smooth materials. Scoring or sanding smooth surfaces like laminates, metals, or dense plastics creates a micro-texture. This rough profile gives the adhesive physical anchors to grip during the curing phase. Wipe down the sanded area with a damp cloth or solvent to remove the resulting dust before applying the bead.
Maintaining proper wet-bed thickness is crucial. Apply a continuous 1/4-inch bead rather than spreading or scraping it flat. The bead must compress to fill gaps between the two materials. Bead patterns matter significantly. Use serpentine or straight parallel lines. Avoid closed loops. Closed loops trap air pockets and prevent moisture from escaping, which halts the curing process in the center of the application. The venting technique accelerates tack. Press the surfaces together, pull them apart for two to three minutes to allow solvents to flash off, and then re-mate them for a much faster initial grab.
Cut the nozzle at a 45-degree angle to ensure a consistent 1/4-inch bead.
Puncture the inner foil seal completely to prevent tube blowouts.
Apply the adhesive in straight, parallel lines spaced 2 to 3 inches apart.
Press the materials together firmly with a slight twisting motion to spread the bead.
Secure the joint with mechanical fasteners or clamps immediately.
Identify your exact substrate materials and classify their porosity before selecting an adhesive formulation.
Perform a mechanical abrasion and solvent wipe on all metal or smooth plastic surfaces prior to application.
Apply a continuous 1/4-inch bead in parallel lines, avoiding closed loops that trap air and moisture.
Secure all overhead or load-bearing applications with permanent mechanical fasteners alongside the adhesive.
A: Yes, but only on specific types. It works well on rigid plastics like PVC, ABS, and fiberglass. However, standard formulations will fail on low-surface-energy plastics like polyethylene (PE) and polypropylene (PP). Always check the product label for plastic compatibility.
A: Standard water-based formulations will not cure properly between two non-porous metal surfaces. To bond metal to metal, you must use a polyurethane-based heavy duty formulation, and both surfaces must be aggressively degreased and scuffed prior to application.
A: On porous surfaces like wood, it typically achieves a solid initial grab within 15 to 30 minutes. However, it requires a full 24 to 48 hours to cure completely and reach maximum structural strength. High humidity or low temperatures will extend this time.
A: For drywall, it is used in conjunction with screws to reduce the number of fasteners needed and prevent nail pops. For load-bearing shelving, adhesive should never entirely replace mechanical fasteners due to the risk of shear and peel failure over time.
A: The most common reason is trapping a solvent or water-based adhesive between two non-porous surfaces, preventing evaporation. It can also fail to dry if applied in temperatures below 40°F or if the adhesive was applied too thickly without proper air exposure.
A: It will bond to the paint, but the overall strength of the bond is only as strong as the paint's adhesion to the wall. If the paint peels, the adhesive joint fails. It is always recommended to sand down to the bare substrate for critical applications.
A: Not all formulations are waterproof. Standard interior latex versions will degrade if exposed to continuous moisture. For exterior applications, you must select a specific exterior-grade or polyurethane formulation designed to withstand weather and freeze-thaw cycles.


