+86-20-86215789 service@adhesive-dy.com

Views: 0 Author: Site Editor Publish Time: 2026-07-30 Origin: Site
Panel installation presents a straightforward structural engineering challenge. When wall treatments fail under thermal expansion or structural settling, the root cause usually traces back to improper adhesive distribution rather than the product itself. Incorrect adhesive application leads to severe warping, noticeable hollow spots, complete panel detachment, and extensive rework. Installers frequently blame the materials when panels pull away from the drywall, yet the true culprit is a lack of understanding regarding how adhesive volume and placement dictate long-term structural integrity.
Achieving a permanent, zero-fail bond requires a strict technical evaluation of bead spacing, bead sizing, and substrate preparation. By understanding the mechanical relationship between the panel, the wall, and the adhesive, you eliminate the risk of delamination. This guide breaks down the exact specifications and application methodologies necessary to secure wall panels permanently, ensuring they withstand environmental fluctuations and physical impacts over decades of use.
Optimal Geometry: A 1/4-inch continuous bead spaced every 10 to 12 inches provides the ideal balance of shear strength and flexibility for standard interior paneling.
Adhesive Selection Matters: Match the project chemistry to the substrate; while specialized Liquid Nails Paneling, Wood & Form Molding Adhesive delivers precise placement for standard panels, non-porous materials demand a high tack MS polymer adhesive.
Mechanical Support is Non-Negotiable: Chemical adhesives require sustained pressure during the initial cure cycle; 18-gauge brad nails and strategic temporary bracing (applied for the first few hours) are critical implementation steps, not optional redundancies.
Application Methodology: Continuous vertical beads outperform the "dot method" by preventing trapped air pockets, ensuring even moisture escape, and distributing expansion stress evenly across the panel.
A successful panel bond demonstrates uniform adhesion across the entire surface area, zero flex when physical pressure is applied, and absolute resistance to seasonal expansion and contraction. When wood or composite panels absorb humidity, they naturally expand. If the adhesive application is inconsistent, this expansion creates localized stress points that eventually tear the adhesive away from the drywall paper or the panel backing. Achieving uniform adhesion means the panel and the wall act as a single monolithic structure, distributing everyday impacts and environmental stresses evenly.
The mathematical relationship between bead width, compression upon application, and the resulting surface area contact forms the foundation of a secure bond. A cylindrical bead of adhesive flattens out when the panel is pressed against the wall. If you apply a standard bead, the compression forces the material to spread laterally, increasing the surface area contact by a predictable margin. If the initial bead is too thin, the compressed surface area will be insufficient to hold the panel's weight. If the bead is too thick, the material will not compress fully, leaving the panel floating slightly off the wall and compromising the flush finish required for professional installations.
Spacing beads wider than 12 inches introduces the severe structural vulnerability known as the "hollow spot" risk. When the distance between adhesive lines is too great, the unbonded sections of the panel flex inward when pushed or outward when the material naturally bows. This localized warping ruins the visual aesthetic of the wall treatment and makes the panel highly susceptible to blunt force damage. A stray impact from furniture or heavy foot traffic against a hollow spot easily cracks rigid panels or permanently dents softer wood composites. Maintaining tight, consistent spacing eliminates these unsupported spans.
Conversely, over-applying adhesive by spacing beads too closely carries negative trade-offs. Applying lines of adhesive every three or four inches leads to excessive squeeze-out, wasted material, and severe panel distortion. Packing the space behind the panel with excess adhesive restricts the airflow necessary for the curing process. Most standard construction adhesives rely on the evaporation of solvents or moisture to achieve their final cure. When beads are spaced too tightly, the trapped adhesive in the center of the panel cannot off-gas properly, exponentially increasing curing time and leaving the center of the panel vulnerable to movement for weeks.
Environmental considerations drastically alter the baseline rules for bead spacing, particularly in kitchens, bathrooms, and other high-moisture zones. Humidity, steam, and rapid temperature fluctuations force wood panels to expand and contract at an accelerated rate. To resist this moisture-induced warping, adjust the adhesive geometry. In these environments, tightening the bead spacing to 8 to 10 inches provides the additional shear strength necessary to hold the expanding wood flat against the substrate. This tighter grid ensures that the mechanical forces generated by the swelling wood are fully counteracted by the chemical bond of the adhesive.
Panel Material | Environment | Recommended Bead Spacing | Bead Size |
|---|---|---|---|
Standard MDF / Wood Paneling | Dry Interior (Living Room, Bedroom) | 10 to 12 inches | 1/4-inch |
Solid Wood Wainscoting | High Moisture (Kitchen, Bathroom) | 8 to 10 inches | 1/4-inch |
Heavy Plywood / Structural Panels | Garage / Unfinished Spaces | 8 to 10 inches | 3/8-inch |
FRP / Tileboard | Commercial Kitchens / Washrooms | 6 to 8 inches (or full trowel) | 1/4-inch |
The industry-standard recommendation for panel installation is applying a continuous line of adhesive every 10 to 12 inches across the back of the material. This manufacturer baseline is the calculated optimal distance that balances material consumption with structural integrity. When using heavy-duty formulations, this spacing ensures that the shear strength of the cured adhesive exceeds the maximum potential warping force of the panel. By adhering strictly to the 10 to 12-inch rule, installers guarantee that every square foot of the panel receives adequate support without creating the airflow restrictions that delay the curing process.
The necessity of a 1/4-inch bead is another technical specification that must be respected. When you cut the applicator nozzle to extrude exactly 1/4 inch of material, you dispense the precise volume required to bridge the gap between the panel and the wall. Drywall is rarely perfectly flat; it contains minor irregularities, taped seams, and subtle bows. A 1/4-inch bead provides enough mass to fill these voids while still compressing flat enough to keep the panel tight against the high spots. Thinner beads fail to make contact in the low spots, while thicker beads prevent the panel from seating properly against the wall.
Understanding how environmental variables impact the cure time of standard liquid nails construction adhesive is vital for scheduling and mechanical fastening. Temperature, ambient humidity, and the porosity of the substrate all alter the off-gassing and curing phases. In cold environments, the solvents evaporate much slower, requiring mechanical fasteners to remain in place longer. Highly porous substrates like raw drywall or unfinished wood absorb the adhesive's moisture rapidly, accelerating the initial grab. Applying standard adhesives over painted walls or moisture-resistant drywall slows the absorption rate, demanding strict adherence to bracing protocols until the chemical bond reaches full tensile strength.
Cut the nozzle at a 45-degree angle to produce a 1/4-inch bead.
Puncture the inner seal of the cartridge using a long nail or the puncture tool on the caulking gun.
Apply a continuous perimeter bead 1 inch from the edge of the panel.
Apply continuous vertical beads every 10 to 12 inches across the field of the panel.
Press the panel firmly against the substrate within 15 minutes of application.
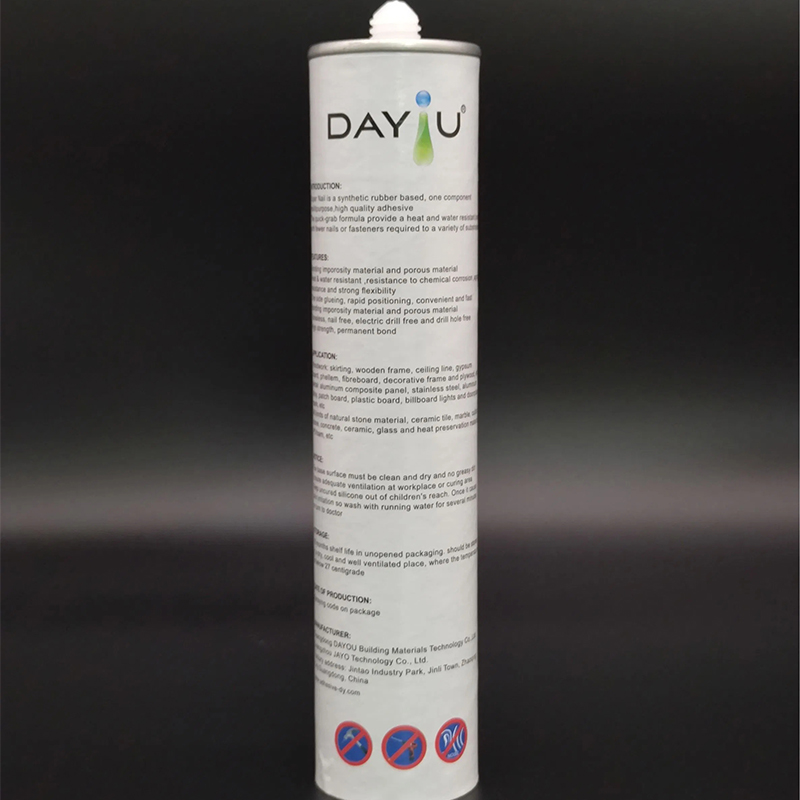
Selecting the correct chemical formulation is just as important as the physical application geometry. Liquid Nails Paneling, Wood & Form Molding Adhesive is engineered specifically for interior paneling, sheet rocking, and molding. This highly flexible, low-solvent option prevents damage to delicate panel finishes and avoids bleeding through thin veneers. Its primary advantage is its ability to retain precise placement immediately upon application. The high initial tack minimizes the panel's tendency to slide down the wall, significantly reducing the need for heavy mechanical fastening during the first hour of installation.
For heavy wood, dense drywall, and structural panels, standard heavy-duty construction adhesive remains the optimal choice. This formulation prioritizes maximum shear strength and gap-filling capability on uneven substrates. When installing thick plywood wainscoting or heavy MDF architectural panels, the adhesive must bridge significant gaps and hold immense dead weight. The heavy-duty variant cures into a rigid, incredibly strong bond that prevents heavy panels from sagging over time, making it the standard for load-bearing aesthetic installations where structural failure is not an option.
When working with highly porous masonry, unfinished wood, or concrete backer boards, a universal beige mounting adhesive provides a specialized alternative. This formulation is designed for applications requiring specific color matching to prevent visible bleed-through on lighter materials. It offers enhanced initial grab on highly porous surfaces that might otherwise draw the moisture out of standard adhesives too quickly, causing a brittle bond. The beige mounting adhesive ensures a seamless visual finish while maintaining the necessary structural grip on challenging, highly textured substrates.
Modern architectural designs frequently incorporate heavy, non-porous materials like tileboard, Fiberglass Reinforced Plastic (FRP), or large format acrylic panels. These materials demand an upgrade to a high tack MS polymer adhesive. Standard solvent-based adhesives cannot cure properly between two non-porous surfaces because the solvents have nowhere to evaporate. MS polymer adhesives cure via a chemical reaction with ambient moisture rather than evaporation. They provide an immediate, zero-slip hold that is mandatory for heavy, slick panels, ensuring they remain exactly where placed without sliding down the wall while the chemical curing process completes.
The debate between using a continuous bead versus the "dot method" (spot gluing) is easily settled by examining structural integrity. Continuous vertical lines provide a uniform channel for air to escape as the panel is pressed to the wall. The dot method traps pockets of air between the adhesive spots. These air pockets prevent the panel from sitting flush and create uneven stress points across the material. Over time, the isolated dots of adhesive act as fulcrums; as the panel expands and contracts, it pivots on these dots, eventually leading to material fatigue and delamination. Continuous vertical beads distribute expansion stress evenly across the entire height of the panel.
Proper application requires a combination of perimeter gluing and field gluing. Installers must run a continuous line of adhesive approximately 1 inch from all perimeter edges of the panel, combined with the standard 10 to 12-inch spacing in the field. Stopping the adhesive 1 inch short of the edge prevents messy squeeze-out onto adjacent panels while ensuring the edges are firmly locked down. Failing to secure the perimeter leads to edge curling, where the seams between panels lift away from the wall, destroying the seamless look of the installation and creating catching hazards.
A common misconception in panel installation is that modern chemical adhesives replace mechanical fasteners entirely. Brad nails serve a critical, temporary function. Frame brad nails as temporary clamps that hold the precise placement of the panel and maintain constant physical pressure while the adhesive reaches its full tensile strength. The chemical bond provides the permanent hold, but the mechanical fastener is required to survive the curing phase. Using 18-gauge brad nails, typically 1-1/4 to 2 inches in length depending on the drywall thickness, allows you to secure beadboard or wainscoting directly into the wall studs while the glue sets, ensuring the panel does not shift.
Wood memory pull-back is a phenomenon where warped or bowed wood panels attempt to return to their original curved shape before the adhesive has cured. To prevent this, installers must implement a strict pressure protocol. Applying uniform physical pressure across the panel face is an operational requirement. Use scrap wood blocks, bracing poles, or heavy laminate rollers to keep the panels pressed tightly to the substrate. This sustained pressure must be maintained for the critical first 2 to 3 hours of the curing cycle, ensuring the adhesive fully wets out against both surfaces and creates an unbreakable mechanical lock.
Installing rigid panels on uneven or bowed drywall requires a specific mitigation framework. You cannot force a perfectly straight panel to conform to a severely bowed wall without creating immense stress on the adhesive bond. To manage substrate irregularities, adjust your bead thickness dynamically. Apply a thicker bead in the low spots of the wall and a thinner bead on the high spots. Combine this variable adhesive application with strategic mechanical fastening, driving brad nails specifically at the high points to anchor the panel, allowing the thicker adhesive in the low spots to bridge the gap without pulling the panel out of plumb.
Applying sustained pressure during the cure cycle is often the most neglected step in panel installation. Pushing the panel against the wall with your hands for thirty seconds is entirely insufficient. To ensure the adhesive fully wets out against both the panel backing and the wall surface, use mechanical leverage. Utilizing adjustable bracing poles wedged against the opposite wall, or aggressively rolling the entire surface with a heavy laminate roller, forces the adhesive into the microscopic pores of the substrate. This action maximizes the surface area contact and eliminates the microscopic air gaps that lead to premature bond failure.
A social media trend has popularized the idea of using only brad nails to install beadboard and wainscoting, entirely omitting construction adhesive to save time and allow for easier future removal. This "no adhesive" counter-argument ignores fundamental structural mechanics. Relying solely on 18-gauge brad nails for permanent installations guarantees long-term failure. As the house settles and the wood expands with seasonal humidity changes, the thin brad nails bend and loosen. This leads to nail pops, rattling panels, severe bowing, and unsightly seasonal gapping at the seams. Chemical adhesives like Liquid Nails are mandatory to lock the entire surface area of the panel to the wall, preventing the micro-movements that destroy purely mechanical installations.
Wipe down all drywall and panel backing surfaces with a damp cloth to remove dust before applying adhesive.
Measure and dry-fit every panel against the wall to confirm plumb lines before dispensing any glue.
Apply a 1/4-inch continuous bead every 10 to 12 inches, keeping the adhesive 1 inch away from all edges.
Secure the panel immediately with 18-gauge brad nails driven directly into the wall studs.
Set up bracing poles or apply heavy roller pressure for the first 3 hours to guarantee full surface contact during the initial cure.
A: Apply a 1/4-inch continuous bead every 10 to 12 inches across the back of the panel. If you are installing the beadboard in a high-moisture environment like a kitchen or bathroom, reduce the spacing to 8 to 10 inches to provide extra resistance against moisture-induced warping.
A: Yes. 18-gauge brad nails act as temporary clamps during the initial cure time. They hold the panel tight against the wall, preventing the wood's natural memory from pulling away from the substrate before the chemical adhesive reaches its full structural strength.
A: Use 18-gauge brad nails that are typically 1-1/4 to 2 inches long. This length ensures the fastener penetrates deeply through the beadboard and the drywall, anchoring securely directly into the wooden wall studs behind the drywall.
A: No. The dot method traps air behind the panel, creates uneven stress points, and lacks the necessary support across the panel face. Continuous vertical lines ensure even adhesion, allow air to escape during compression, and distribute expansion forces evenly.
A: A 1/4-inch bead is the optimal size. This specific volume provides enough material to bridge minor gaps and wall irregularities while allowing the adhesive to compress flat enough to keep the panel flush against the substrate.
A: You must apply mechanical pressure or bracing for at least 2 to 3 hours. This sustained pressure ensures a full bond transfer between the panel and the wall before the adhesive begins its primary cure cycle, preventing the panel from shifting.
A: Standard solvent-based adhesives often fail on non-porous surfaces because the solvents cannot evaporate. For tileboard, FRP, or other non-porous panels, you must use a high tack MS polymer adhesive, which cures via moisture rather than evaporation and provides immediate hold.


